
1. Set the dimensions and open the artwork editor
Begin in the box configurator with internal dimensions and project options. Choose Create or upload artwork to enter Design Studio. The steps at the top connect size, artwork and the summary. The surfaces available for customisation depend on the selected box.
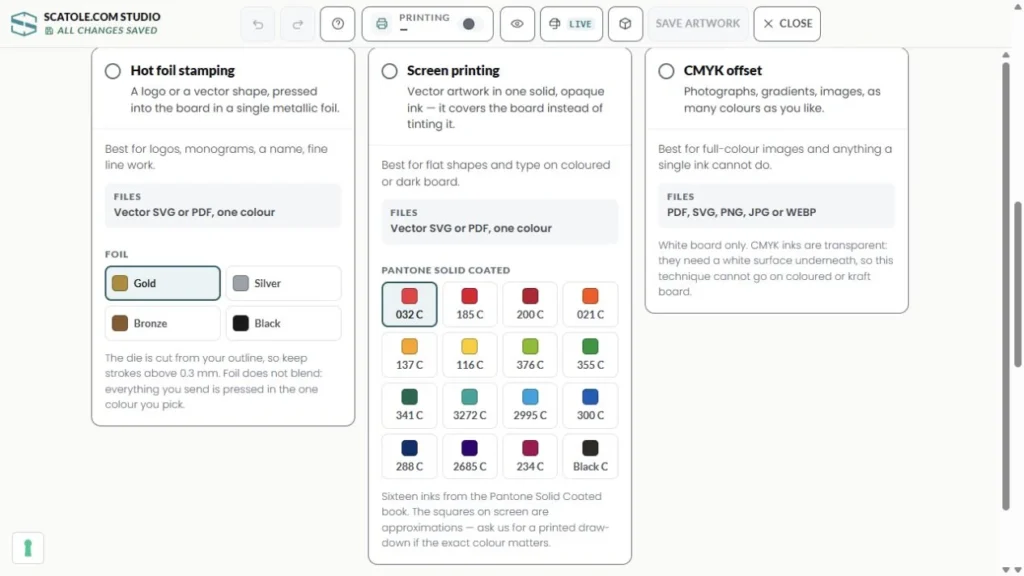
2. Choose the printing process
Select from the available techniques: hot foil stamping, screen printing or CMYK where supported. For foil and screen printing, prepare vector artwork in the required single colour; for CMYK, the editor also accepts images in the listed formats. Process, substrate and print area must be compatible. Printing / Production lets you review these settings.
3. Select the surface before adding anything
Use the surface tabs and, where present, the project boards. Check the active surface name: new elements will be placed there. A drawing of one surface does not automatically represent the entire box. Read the dimensions displayed on the canvas.
4. Upload a file or build the composition
Use Add file to upload compatible artwork. Image, Text and Shapes let you build a composition on the surface. Use an available vector file for a logo and check lettering and details at their final size. Read any file warnings before continuing.
5. Position, align and organise layers
Use Select to choose an element, then adjust its position and size with the available controls. Align assists alignment, Grid helps arrangement and Layers manages element order. With Copy to, check the destination before copying an element or a whole surface.
6. Review the artwork and technical drawing
Clean view hides technical guides so you can judge the composition. 2D preview shows the flat development; 3D preview is available for supported models. Check safe areas, folds, orientation and every relevant surface. The screen effect is not a physical colour or finish proof.
7. Read the check results
Where available, Print compatibility reports checks for resolution, edges, colours and technique. “Check” or “Not checked” does not mean approved. Other models are checked by our studio according to the workflow stated on the page. Print pack, where present, collects the project files.
8. Save the artwork and return to the summary
Use Save artwork when available and confirm the save status. Return to the configurator to review artwork, quantity, price and the order or quote process. Saving in the editor is separate from approving artwork for production.
- The correct surface and board are selected.
- Files match the technique.
- Text, orientation and placement have been checked.
- Warnings have been resolved or referred to the studio.
- Artwork is saved and the summary reviewed.
Try the workflow with a base and lid box or magnetic box. Before starting, read how to prepare the files and how to choose the printing process.